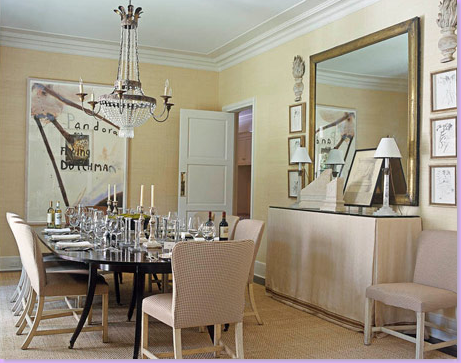
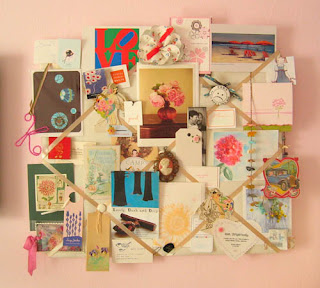
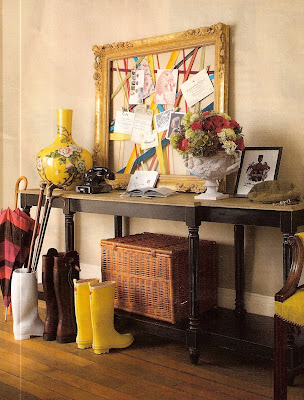
Recently I've seen skirted console tables in many of my decorating magazines, and I just love them. I'm determined to figure out how to make one and when I do, I'll share it with you!
from Little Green Notebook
from Urban Grace Interiors
from Cote de Texas
"No-Sew Skirted Table" from The Newlywed Diaries
from La Dolce Vita
from Material Girls
Friday, August 21, 2009
Thursday, August 20, 2009
Make a Fabric Headboard
Don't have a headboard? No problem!
To make your own you'll need:
-a piece of plywood cut the width of your bed and the height you prefer
-piece of foam 3-5" think cut the size of your plywood
-fabric that is at least a foot larger on all sides than your piece of plywood
-staple gun and staples
-heavy duty picture hanging cleat (see pictures below)
FYI: Bed sizes
Twin 39"wide
Double/Full 54" wide
Queen 60" wide
King 76" wide
CA King 72" wide
Once you know the width of your plywood, decide the height. It may depend on your room size, pillow sizes, etc. but I would recommend a headboard that's at least 3 feet tall. That way, you'll be able to clearly see it even with pillows in front of it.
To make your headboard...
1. First, lay the fabric on a table, or another flat surface, face down. The fabric I used wasn't wide enough, so my mom sewed three pieces of fabric together and sewed them together vertically to achieve the width I needed for a queen sized bed. You can hardly see that it's several pieces of fabric sewed together because she did such a great job matching up the pattern of the fabric, and you can do the same.
2. Center the foam on top of the fabric and then the piece of plywood on top of the foam.
3. Pull the fabric as tightly as possible and staple it to the plywood with a staple gun. It's best to have one person holding the fabric and another person pulling and stapling the fabric on the opposite side.
4. Determine where you want your headboard to hang on the wall. I would recommend pushing your mattress and frame against the wall and marking where the center of the bed hits the wall. Now hold the headboard over the mattress and let it rest just over the mattress. Make a mark on the wall above the headboard. Now hang your cleat about a foot or so down from the mark you made on the wall where the headboard was. Make sure it's centered (use the mark you made just over the mattress) and hang your cleat. Now hang the other half of the cleat on the back of your headboard. Make sure the screws are heavy duty, but don't use anything too long. You don't want puncture your headboard on the other side or poke someone if they're leaning against it.
5. Connect the cleat and push your mattress under the headboard!
The bottom left piece will attach to the back of the headboard, about half way down. The top right piece should hang on your wall and be positioned so that it hangs directly over your bed.
Once the pieces are connected they should look like this (below):
Sunday, August 16, 2009
Make a Sink Skirt
Sink skirts are a wonderful idea if you have an unsightly pedestal sink or a wall sink with exposed pipes underneath. They're also great for hiding extra storage (plastic bins, shelving, etc.) underneath.
Materials:
-fabric
-lining (optional)
-coordinating thread
-velcro
Start by measuring around the front of the sink, from wall to wall. Then take the measurement from the floor to the top of the sink. Now add four inches in both directions (2 inches extra on each side). Before you cut your fabric, decide where you'd like the top of your skirt to be on the pattern. For example, I chose the horizontal green line as the top of my skirt and I cut the fabric accordingly (2 inches up from the green line, etc.) Cut your fabric to the size you need and lay it on a flat surface with the back side up. If you'd like to use lining, lay it on top of your fabric facing up so the two sides face away from each other. I would only use lining if your fabric is thin or if the back side is rough (the fabric I used below was woven and the backside had lots of loose ends so I chose to line it).
Now, fold the top down one inch, iron it in place, and then fold it over again one inch. Sew the fabric in place at the top of the fold. Do the same for the bottom, but before you sew it, check and make sure it's the correct height for your sink.
Fold over the sides the same way you folded the top and bottom-- one inch, iron, fold over one inch again and then sew. Again, check to make sure the fabric fits around the sink first before you finish sewing it.
Detach the two sides of the velcro tape from one another and sew the non-sticky side to the top of your skirt. I sewed the top and bottom of the velcro to make sure it wouldn't come off easily.
Take the other side of the velco, the sticky side, and attach it to the velcro you just sewed to your skirt. Position the skirt in place around the sink (to make sure it's at the correct height) and press hard to make sure the sticky sided velcro stays in place on the sink.
Wednesday, August 12, 2009
Repurpose an Old Lamp
I got this idea from Just a Little Bit: For the Love of Design. I'm already thinking of some old brass lamps my mom has but isn't currently using. After painting the base, all the lamps would need are new shades!
Can you believe this is used to be an old brass lamp??
Make a Monogrammed Ornament
I made these ornaments last year for all my family members and attached their letter to the top of their present instead of a gift card. They're also cheap and easy to make. Find out how to make them here.
Monogram
I saw this post on one of my favorite blogs, Little Green Notebook. Sadly, I don't have Photoshop (although I'd love it), but I think you could make something similar on Microsoft Publisher or enlarge the image on your computer screen, like she did, and trace it (or print it out) on paper. Here are some ideas at Leontine Linens, which is what she used.
I found this one on their site, which is pretty close to our initials. I could easily change the "C" to a "D" to make it work...just an idea. I'm now trying to think of what I could monogram in my house...
Another idea is to monogram glasses with paint pens. I got this idea from my sister-in-law. She monogrammed some wine glasses for some friends and monogrammed a small water pitcher and cup for me when I got married. She does it free hand, but you could make a stencil for this as well.
Tuesday, August 11, 2009
Make a Ribbon Board
I made a ribbon board for one of my sisters-in-law a few years ago. She was going to college the following year, and I thought this would be a great way for her to organize her pictures, notes, etc. The nice thing about this craft is that you can customize it.
Materials:
-cork board
-batting
-piece of burlap or fabric that covers the cork board and wraps around to the back at least 1/2"
-ribbon; you can use different colors, widths and designs
-upholstery tacks
-staple gun
-hot glue gun
1. Start by stapling the batting and the burlap to the front of the cork board. Pull it taut and staple around the edge of the back.
2. Lay the ribbon across the board in the pattern you like (vertical, horizontal, diagonal, crisscross) and cut it accordingly. Staple the ends of the ribbon on the back of the board.
3. Use the upholstery tacks to secure the areas where the ribbon overlaps (the "intersections") and on the front edges of the board. Lightly tap the tacks into place.
4. Cover up the staples in the back by hot glue gunning a piece of ribbon around the edge.
Vertical ribbons
Crisscross ribbons
Ribbons placed haphazardly
Here is another idea for covering a corkboard.
Create a Wine Cork Board
I love this cork board because it's become such a conversation piece in my kitchen. Everyone asks about it-- did I make it? how did I get the corks to stay? did I drink all those bottles of wine? where did I find the frame? I'm here to answer your questions!
Materials:
-large, decorative frame; or a cork board with a decorative frame
-various wine corks (Note: I didn't have enough corks at the time I was making my board so I bought a bag of 200 used corks-- I like the "touched wine" look-- for about $8 on Ebay)
-hot glue gun
-X-acto knife
1. Choose a design and place the corks accordingly on your board. If necessary, cut the corks in half or to the correct length.
2. Now glue each cork on place and allow it to cool.
I used the herringbone pattern and I found my framed cork board at TJMaxx or Homegoods, although I've seen them many other places.
Lined in a row horizontally
Herringbone
Two by two
Flat top
This is where I collect my wine corks...I'm saving up to make another cork board!
Make Ant Repellant
+
I just heard this the other day...
Mix water and white vinegar together to make a natural ant deterrent!
Materials:
-1/4 C. white vinegar (it erases the scent trail ants lay for other ants to follow)
-2 C. water
-spray bottle or mister
-optional: lemon, orange or grapefruit peel; the citrusy smell repels ants, kills the fungi they like to eat, and makes the vinegar smell better
Spray it on areas (tables, chairs, baseboard, floor) that are waterproof.
Monday, August 10, 2009
Paint Flower Pots
If you're like me, you love flowers and live greenery in your home. I would like to buy freshly cut flowers every week, but in order to save a little cash I like to have indoor plants that give the same effect. However, most of my terracotta pots have been sitting outside so they're either dirty or don't quite have that cool, patina look to them. Instead of buying new ones, consider painting them.
I got this idea from an article in one of Martha Stewart's old Living magazines. She suggests using oil-based enamel paints to give the pots a glazed, or shiny, look. Don't forget to paint the bottom first, let it dry, then flip it over to paint the sides and inside. Add an indoor (or outdoor) plant, and voile! a fresh look to something you already had.
Martha Stewart's painted (with oil-based enamel paint) pots
Wrap painter's tape around the middle of the pot and then paint one half.
Paint the pot turquoise and then sand some of the areas with course sandpaper to give it an aged look.
Paint a small pot, fill with moss and then use it as a table marker, place card, picture holder, decorative accessory, etc.
I made these pots a couple of years ago. I got the idea out of a Pottery Barn catalog, except their pots cost about $5 each. I bought these 4" terracotta pots for $.87 each, painted them with chalkboard paint (about $5 for a quart), and then wrote the name of the herbs in chalk. You can easily wash off the chalk, let it dry and then write something new.
Or, you could paint the pots and then paint or stencil the names of the herbs you have.
I also liked this idea. Paint only the bottom or top half and write inspiring words or phrases.
You could even group several painted pots and plants in the middle of a table as a centerpiece.
Get Rid of Unwanted Marks and Grime
Mr. Clean Magic Eraser is my favorite cleaning tool! It's amazing because all you have to do is add water. It's cleaned surface areas that I never thought would get any better-- tub stains, marks on the wall and ceiling, and scuff marks on the floor. Try this first before you have your home professionally cleaned or painted. I think the only thing it doesn't work on is carpet.
Here's the description:
Brighten up your home by helping to renew its surfaces. Mr. Clean Magic Eraser Original will help your walls, baseboards, floors, switch plates, blinds and more look like new again by easily removing scuff marks and dirt. To discover the cleaning possibilities, simply take a swipe. Its water-activated micro-scrubbers reach into the surface grooves, lifting away built up grease and soap scum. The Mr. Clean Magic Eraser Original is so powerful that each swipe removes more grime than the leading all-purpose spray cleaner, and it has no harsh chemicals. Before long, you’ll be back to the things you love best in a brighter, cleaner space.
Make Teriyaki Flank Steak
I'll admit it. I don't cook a lot of red meat. I guess that's a good thing, but I think my husband probably wishes I made it more often than I do. Besides the fact that eating less red meat is healthier, the real reason I rarely ever buy red meat is because I really don't know how to cook it. My husband prefers the meat rare inside, so I never know if I've cooked it enough or too much. Regardless, this recipe for flank steak is excellent and was given to me by a great friend of mine, Mary Katherine (this is a shout out to her!)
Flank Steak
Soy Vay's Very Very Teriyaki Sauce
Note: Don't try and substitute this marinade for another type of teriyaki sauce. It's got a distinct and DELICIOUS flavor that cannot be replaced! It can also be used on salmon, chicken, pork, whatever you like!
1. Marinate the steak in the teriyaki sauce for several hours (overnight is even better).
2. Set your oven to broil and let it heat up.
3. Place the steak on a broiling pan and put it in the oven, with the door slightly ajar, for 7 minutes.
4. Take the steak out and turn it over. Cook on the other side for 7 minutes.
5. Slice thinly (1/4" thick) against the grain and serve. It's especially good with rice and grilled veggies.
Make Floral Arrangements
My sister-in-law, a wedding planner in Charleston, SC, gave me these tips on making floral arrangements. She works at W.E.D. and also writes for their blog.
Buy some clear, waterproof floral tape. I bought some at the local grocery store here (in the floral department), but I'm sure you could also find it at Michael's or another craft store.
1. Cut pieces of the floral tape and extend them over the opening of the vase, leaving about 1/2" between each piece. After going across the top in one direction, turn the vase 90 degrees and tape more pieces across the top to make a grid. The grid will help the flowers stand up and stay in place.
2. Before you place the flowers in the vase, take off most of their leaves. Leave a few at the top, closest to the flower, for greenery, but pinch off the rest. It will give you more room to place the flowers and you won't have to worry about the leaves touching or falling into the water in the vase. The leaves typically are what carry the dirt, germs and other diseases that can get into the water and kill your flowers.
3. Starting with the flowers with the tallest stems, arrange them in the middle of the grid, working your way out with the shorter stems. If you're adding in different types of flowers, group them in threes or put an odd number of flowers in the arrangement.
Below are a few of my favorite flowers. Love for reasonably priced fresh flowers (if you don't have your own) at your local grocery store, Farmer's Market, Costco, Sam's, or my favorite- Trader Joe's.
Hydrangea; I love it because it's beautiful and classic, but I also like it because the tops are so full you don't have to use as many flowers.
Kermit mums
Pomander (floral foam ball with kermit mums)
Ranunculus
I love to put whole lemons and limes or cut them up (above) to fill the vase.
Simple arrangement of 3 Calla Lilies of differing heights
Blue hydrangea and white roses
Freesia and white Stock
Drendrobium Orchids
These white hydrangeas were from my wedding. I let them dry out in water and then hung them from clothes hangers upside down for a few days.
Subscribe to:
Posts (Atom)